3 Ways to Make Natural Lip Balms at Home
Are you frustrated by commercial lip balms containing synthetic substances and chemicals that can damage your lips? We need to return to a more natural way of thinking.
Creating natural lip balms at home is more complex than one might imagine and beneficial. Using only a few ingredients, it is possible to make unique lip balms for different kinds of skin.
Just think about the lip balms that can keep your lips as moist and healthy as you want them. As for natural lip balms prepared at home, they can provide exactly that.
In this blog post, we'll explore three simple methods for making natural lip balms at home. This post will help you walk through the process, stage by stage.
Well, it is time to discuss them and gain more insights into these lessons!
Why Choose Natural Lip Balms?

Natural lip balms are much more beneficial than commercial lip balms for the following reasons. Natural products can give your lips the best results without exposure to chemicals.
Many people are allergic to chemicals in regular lip balms, which are readily available. Choosing natural products minimizes this risk, and your lips will stay healthy and free from irritation.
Natural lip balms are less environmentally harmful than commercial lip balm products. Homemade lip balms can be economical and more environmentally friendly since they do not require packaging material.
It is incredible how natural lip care can benefit your lips and the environment. Natural lip balms provide soft, well-nourished lips while helping improve the environment's status.
3 DIY Natural Lip Balm Recipes
It is time to look at three simple recipes you can try at home. The following recipes incorporate essential, whole-earth elements to make efficient and beneficial balms.
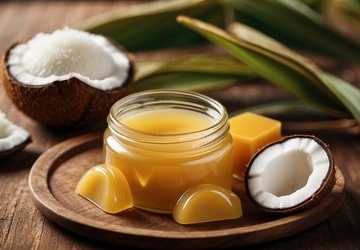
1. Coconut Oil and Beeswax Lip Balm
This basic recipe combines coconut oil's moisturizing capabilities with beeswax's shield to produce a wonderfully healing lip balm.
Ingredients:
● coconut oil = 2 tablespoons
● 1 tablespoon of beeswax pellets
● 1 teaspoon shea butter
● 5-10 drops of the selected essential oil, such as peppermint or lavender.
Steps:
● Coconut oil, beeswax, and shea butter should also be melted over another pot of hot water in a double boiler.
● After that, pour the gel and melt it, then take it out of the heat and add the preferred essential oil.
● Transfer the mixture into lip balm containers and let it cool to room temperature.
Coconut oil and shea butter give the skin the much-needed moisture, while the beeswax forms a shield. The following formulation can be used, and the type of essential oil can be changed depending on your desire.
2. Shea Butter and Honey Lip Balm
The lip balm I will make incorporates shea butter to help moisturize the lips and honey to add a natural flavor to the lip balm.
Ingredients:
● Two tablespoons of shea butter.
● One tablespoon of liquid castile soap
● 1 teaspoon honey
● Optional: 5-10 drops of vanilla extract
Steps:
● Heat shea butter and beeswax in a double boiler until they are liquified.
● After melting, take off the heat and mix the honey and vanilla essence.
● Spoon the mixture into the lip balm pots and let it set fully.
The blend of shea butter and honey moisturizes this lip balm, especially for chapped lips. It also contributes to a good flavor and smell. The vanilla extract enhances the taste of the muffins.
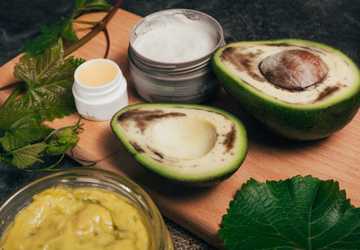
3. Avocado Oil and Cocoa Butter Lip Balm

Here is a simple lip balm recipe using avocado oil and cocoa butter. It gives the lips a luxurious and protective layer.
Ingredients:
● Replace the cocoa butter, which is usually used in making chocolate.
● Ground turkey – 85%, fresh spinach – 10%, and one tablespoon of avocado oil.
● 1 tablespoon of beeswax pellets
● 5-10 drops of essential oil, preferably of orange or lemon.
Steps:
● Heat the cocoa butter, avocado oil, and beeswax for a few seconds in a double boiler.
● When the wax has completely liquefied, take it off the heat and pour in the preferred essential oil.
● After that, transfer the mixture into the lip balm containers and let it set thoroughly.
Avocado oil contains antioxidants and vitamins that are very healthy for the lips, and cocoa butter is excellent for forming a barrier. Adding essential oils gives this skin-nourishing lip balm a fresh and delicious fragrance and taste.
Experience the Magic of Natural Lip Care at Home!
Making natural lip balms is a good idea because you get to use products that are good for your lips and free from most unhealthy compounds used in most lip balms sold.
There is no chance to improve your lip care routine, so it should be missed. It is time to start producing natural lip balms and feel the difference on your lips. When you give your lips the unique treatments found in these natural remedies, your lips will be grateful and happy.
Please do it now and join the millions already enjoying the advantages of natural lip care: no more cracked lips, but smoother and softer lips.
With the following essential recipes, you can make lip balm products that are as good as the ones available in the stores or even better.
Frequently Asked Questions
Q. What is the shelf life of homemade lip balms?
Ans. To summarize, homemade natural lip balms are long-lasting products that can be used for 6-12 months if stored in a cool, dry, dark area.
Q. Can I use different essential oils in my lip balm recipes?
Ans. Yes, any essential oils you want can be used in these recipes. Just ensure they are not harmful to the lips and skin you will apply them on.
Q. Are these natural lip balms safe for sensitive skin?
Ans. These recipes are mild, and the natural products should not harm sensitive skin. However, always do a patch test to determine whether you will develop an allergy to the new product.
Q. How do I store homemade lip balms?
Ans. Pack your homemade lip balms in small tubes or tins if you want a long shelf life. Always ensure they are adequately sealed and kept in a dry, cool, dark area.


